32. Jupyter por dentro
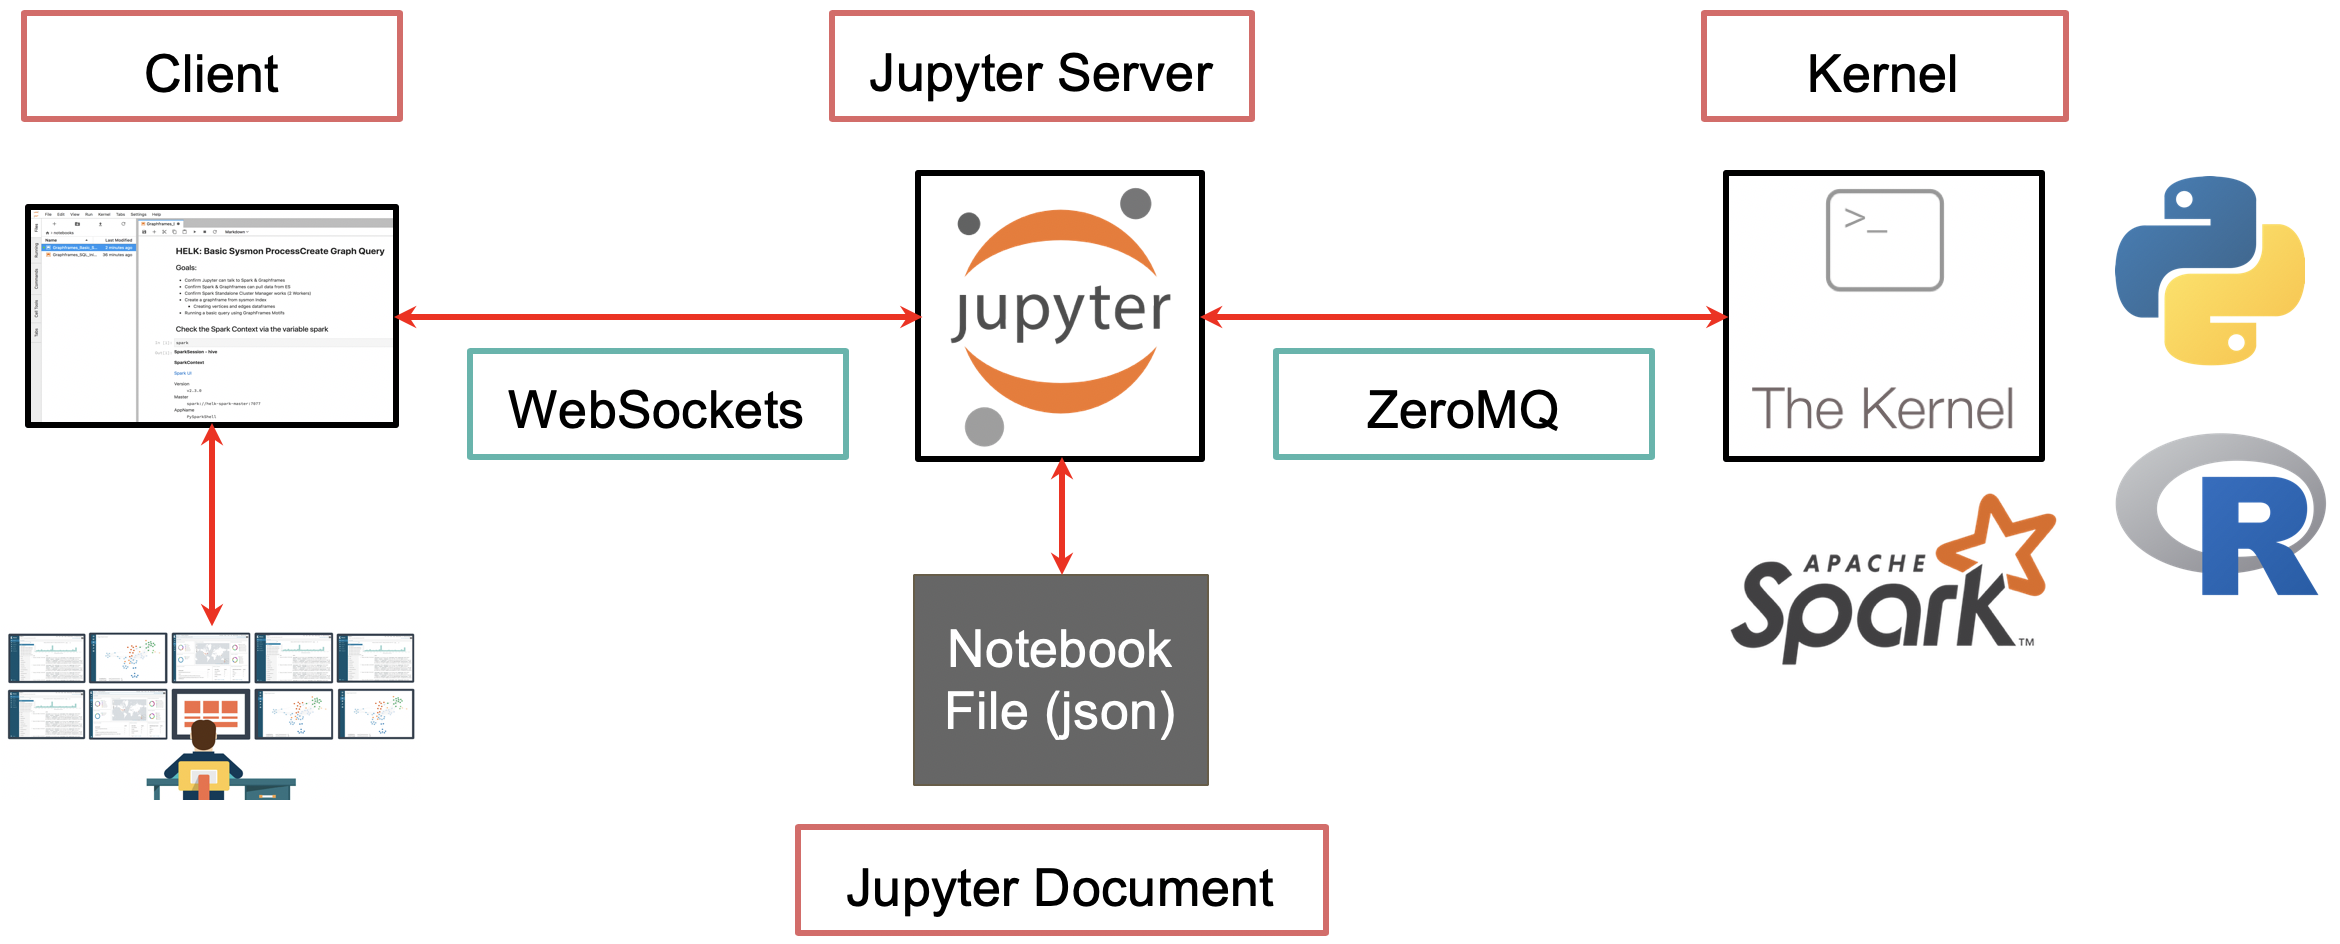
Detalles de como está implementado Jupyter para ver si puedo hacer alguna modificación El esquema de la documentación oficial muestra las diferentes piezas.
32.1 Jupyter docker stack
Colección de imagnes de docker para jupyter
32.2 Arquitectura
JNB funciona con una arquitectura basada en el modelo de "dos procesos", similar al patrón de diseño REPL (Read-evaluate-print loop): Se toma una entrada simple del usuario, se evalua y se devuelve el resultado.

32.3 jupyter core
En github.
32.4 Jupyter Clientes
Documentación oficial. Y codigo y documentación en github
La comunicación entre componentes se hace mediante mensajes según apartado siguiente
32.4.1 Mensajes en Jupyter
Utiliza la librería Zeromq
32.5 Jupyter console
Consola para gestionar los núcleos.
Fuentes en github
32.6 Jupyter Kernels.
- Presentación en video
32.7 Crear una nueva imagen Jupyter.
Pasos: 1. Poner el directori de trabajo en la imagen:
--notebook-dir=/home/jovyan
32.7.1 Ejemplo 1
Conf dockerfile:
# Base image Dockerfile (AWS Deep Learning Containers)
# https://github.com/aws/deep-learning-containers/blob/master/tensorflow/training/docker/2.2.0/py3/Dockerfile.cpu

FROM gcr.io/kubeflow-images-public/tensorflow-1.15.2-notebook-cpu@sha256:87c49f386263b8b3f4ba104617b888a97dad4dd166984c1e1d679435f1763ba1

# Install python3 packages from requirements file. Don’t install package dependencies.
# Run 'pip3 check' to verify if installed packages have compatible dependencies.
COPY requirements.txt /tmp

RUN pip3 --no-cache-dir install --no-deps --requirement /tmp/requirements.txt && \
    pip3 check || true


COPY kf_ssh_key /home/root/.ssh/id_rsa
COPY kf_ssh_key.pub /home/root/.ssh/id_rsa.pub

WORKDIR /root
ENV NB_PREFIX /
ENTRYPOINT ["tini", "--"]

CMD ["sh","-c", "jupyter notebook --notebook-dir=/home/${NB_USER} --ip=0.0.0.0 --no-browser --allow-root --port=8888 --NotebookApp.token='' --NotebookApp.password='' --NotebookApp.allow_origin='*' --NotebookApp.base_url=${NB_PREFIX}"]
32.7.2 Ejemplo 2: crear imagen con Jupyter y Kotlin
De esta web.
Con este dockerfile:
# Let's use the image base-notebook to build our image on top of it
FROM jupyter/base-notebook

LABEL Miguel Doctor <migueldoctor@gmail.com>

# Let's change to root user to install java 8
USER root

# Install java 8
RUN apt-get update \
    && echo "Updated apt-get" \
    && apt-get install -y openjdk-8-jre \
    && echo "Installed openjdk 8"

# Install kotlin kernel for jupyter using conda
RUN conda install -y -c jetbrains kotlin-jupyter-kernel && echo "Kotlin Jupyter kernel installed via conda"

# Let's change to  "$NB_USER" command so the image runs as a non root user by default
USER $NB_UID

#Let's define this parameter to install jupyter lab instead of the default juyter notebook command so we don't have to use it when running the container with the option -e
ENV JUPYTER_ENABLE_LAB=yes
32.8 Herramientas
- nbinteract , para convertir notebooks mediante linea de comandos.